Making the transition from a Windows PC to a MacBook can be difficult to get the hang of— especially when that change coincides with the start of a new semester at a new place, away from parents and the structure of high school.
Because of its portability and performance, MacBooks tend to be the starter laptop of choice for college. This was certainly true for me. While I had been acquainted with MacOS to an extent from computer labs at my school, I was used to Windows laptops and desktops.
Getting a new computer for college is an exciting experience, but one that can also become overwhelming. I remember struggling to even download applications on my MacBook— something I could have done easily on a Windows computer. While it can be intimidating at first, MacOS can quickly become intuitive and easy to use once you are able to figure out the basics.
So, let's start with the basics: how to download and install applications on your MacBook.
For this example, we will go through the process of installing Spotify using Google Chrome.
After going to Spotify's website and finding their download page, I can see that there are several different types of download files for different devices. Since I want to download this on my MacBook, I know I will pick one of the links next to
MacOS X, but first I need to know what version of MacOS I have installed on my laptop.
To check that, I am going to move my mouse all the way to the top of my screen and wait for the menu bar to appear.
Once it does, I am going to click on the Apple logo (it will be the icon all the way to the left) and select About this Mac from the drop down menu.
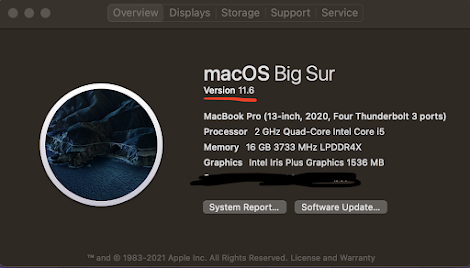
You should see a menu pop up on the screen like the one pictured here. The version running on your MacBook will be listed on the second line (underlined in red on the image). Since my version has a number greater than any of the options listed on the Spotify website, I know that I must be running a current version of MacOS and will be able to download the most recent version of Spotify!
After clicking back onto the Spotify download page, I can then select the version I need to download. After clicking the current option, Spotify redirects me to the appropriate download page, where I can then actually click download to get the application installer file. If selecting an older version of Spotify, the redirect page will be skipped and instead the file will be immediately downloaded. Either way, you should see something like this indicating that the installer file has been downloaded:
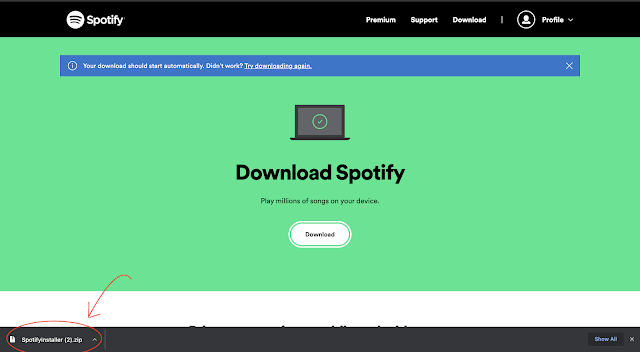
You can then click on the arrow to the right of the file name and select open. Now comes the part that differs most from a Windows download process. Once you open the file, you will see this screen:
While Spotify's installation screen is very straightforward and spells out exactly what you need to do, other applications do not always do a great job of explaining what you need to do to finish your installation. Whereas with a Windows installation you would click through some set-up windows and choose the location for the application to install, with web-based app downloads on MacOS—at least those in a .dmg file— this process is simplified down to a one-step drag and drop.
To complete this process, all you need to do is open the applications folder in Finder and drag the Spotify icon from the installer window into the Applications window. Once you have done this the application should open automatically, but if it does not, just double click on the app icon in the Applications folder to access your new download.
While not every app downloaded on your MacBook will follow this set of steps exactly due to different kinds of installation packages, .dmg installer files like the one in this demonstration are usually the trickiest for ex-Window users to figure out.
Many other kinds of installation packages exist, some mimicking the Windows installation process with a series of clickable windows ensuring you download the file in the right spot, while others immediately download and open with little user input. And, of course, there are apps that come directly from the MacBook App Store.
Now, whatever application you may find yourself in need of, either for class or for a hobby, hopefully you feel a little more comfortable downloading it through MacOS!
If you experience any trouble with this process, do not hesitate to come to the DormNet Help Desk or give us a call at (501)-279-4545.


No comments: